Lab 3 - Potentiometers
Description:
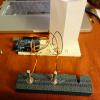
This LED diffuser uses two analog potentiometers to control brightness and blink rate. The code is adapted from the sample code for three pots, but modified to receive input from only two (my third potentiometer was acting strangely, causing short circuits and emitting a slightly burnt smell, so I decided it was best to avoid using it). Blinking has a floor to prevent crazy, seizure-inducing blink rates, and also instead of turning off fully, brightness is brought down to half the initial value.
Components:
- Arduino Uno + USB cable
- Breadboard
- 3 LEDs (red, green, blue)
- 3 220-ohm resistors
- 2 potentiometers
- Aluminum foil
- Polyester batting
- Vellum paper tower
- Cardboard box cut to fit pots
- Washi tape for decoration
Code:
/*
* "Coffee-cup" Color Mixer:
* Code for mixing and reporting PWM-mediated color
* Assumes Arduino 0004 or higher, as it uses Serial.begin()-style communication
*
*/
// Analog pin settings
int potPinBright = 0; // Potentiometers connected to analog pins 0, 1, and 2
int potPinBlink = 1; // (Connect power to 5V and ground to analog ground)
// Digital pin settings
int blueOut = 9; // LEDs connected to digital pins 9, 10 and 11
int redOut = 10; // (Connect cathodes to digital ground)
int greenOut = 11;
// Values
int valBright = 0; // Variables to store the input from the potentiometers
int valBlink = 0;
// Variables for comparing values between loops
int i = 0; // Loop counter
int wait = (1000); // Delay between most recent pot adjustment and output
int checkSum = 0; // Aggregate pot values
int prevCheckSum = 0;
int sens = 3; // Sensitivity theshold, to prevent small changes in
// pot values from triggering false reporting
// FLAGS
int PRINT = 1; // Set to 1 to output values
int DEBUG = 1; // Set to 1 to turn on debugging output
void setup()
{
pinMode(redOut, OUTPUT); // sets the digital pins as output
pinMode(greenOut, OUTPUT);
pinMode(blueOut, OUTPUT);
Serial.begin(9600); // Open serial communication for reporting
}
void loop()
{
i += 1; // Count loop
valBright = analogRead(potPinBright) / 4; // read input pins, convert to 0-255 scale
valBlink = analogRead(potPinBlink);
Serial.print("potPinBright: ");
Serial.print(valBright);
Serial.print(" potPinBlink: ");
Serial.println(valBlink);
analogWrite(redOut, valBright); // Send new values to LEDs
analogWrite(greenOut, valBright);
analogWrite(blueOut, valBright);
if (valBlink > 150){ //if the blink rate is less than this, it's seizure-inducing
delay(valBlink); // stop the program for some time
analogWrite(blueOut, valBright/2); // turn the ledPin down
analogWrite(redOut, valBright/2);
analogWrite(greenOut, valBright/2);
delay(valBlink); // stop the program for some time
}
if (i % wait == 0) // If enough time has passed...
{
checkSum = valBright+valBlink; // ...add up the 3 values.
if ( abs(checkSum - prevCheckSum) > sens ) // If old and new values differ
// above sensitivity threshold
{
if (PRINT) // ...and if the PRINT flag is set...
{
Serial.print("A: "); // ...then print the values.
Serial.print(valBright);
Serial.print("\t");
Serial.print("B: ");
Serial.print(valBlink);
PRINT = 0;
}
}
else
{
PRINT = 1; // Re-set the flag
}
prevCheckSum = checkSum; // Update the values
if (DEBUG) // If we want debugging output as well...
{
Serial.print(checkSum);
Serial.print("<=>");
Serial.print(prevCheckSum);
Serial.print("\tPrint: ");
Serial.println(PRINT);
}
}
}
- Login to post comments
Drupal theme by Kiwi Themes.

