McInterface
User
Interface Design & Development Project
SIMS 213, Spring 2001
![]() :
Linda
Harjono, Saifon Obromsook, John Yiu Chi Wai
:
Linda
Harjono, Saifon Obromsook, John Yiu Chi Wai
|
McInterface
|
| Summary Report | Assignments | Prototypes | Presentations | Team | Vocabulary | Workload Distribution |
First of all, there are
some things that we cannot and will not implement in our design at any stages. 1. Use of a touch-screen.
We always use the mouse to simulate the 'touch' on the screen. In our first interactive
prototype, we can implement most of the functionalities we expected for our
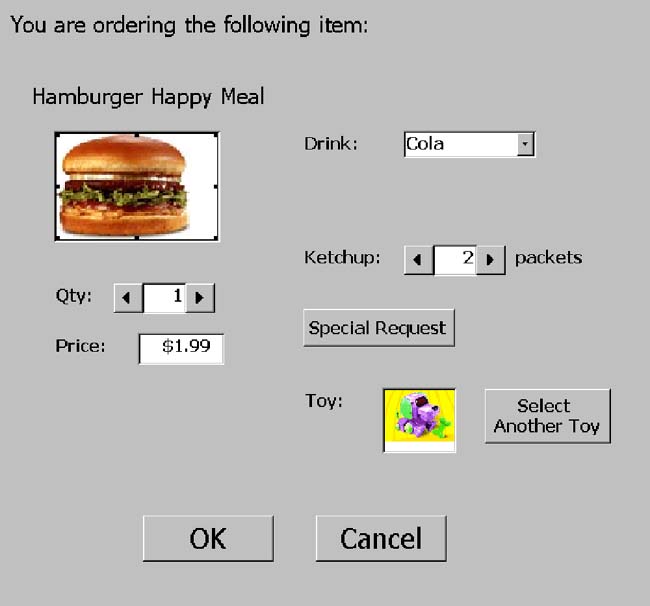
design. We chose to implement food categories that are ordered most frequently
and have the most item details, such as the Extra Value Meal and Happy Meal.
The Happy Meal has the most item details, such as drink, special request, ketchup,
and toys. Here are the things that
we left out to be implemented in the next prototype: Here is our design flow
chart. The initial screen of our
design has three language choices, each of which will bring the users to the
main menu in the respective languages. Our prototype only works for the English
language. Besides, the interface of the system in other languages would essentially
be the same. The main menu page has the
food group choices on the left side. When users click one of them, the food
choices that appear on the page will change. This way, we can show all food
categories in one level. Users can order an item
by clicking on the picture (or the label for beverage). When they do that, the
item detail page will appear. Users can specify the quantity, size, special
request, the drink for meal orders, and number of sauces from this page. Depending on the item that
the users are ordering, the Item Detail can link to the special request page
and/or the toy selection page (if they order Happy Meal). From the Item Detail
page, the users are brought back to the Main Menu page. From the Main Menu, the
user can also see the toys that are available. This way, they would be able
to preview the toys first before they decide to purchase a Happy Meal. From the Main Menu page,
the user can quit at any time. There is also a button that brings the users
to the Order Summary page. From this page, users can still go to the Item Detail
page of each item that they ordered and make changes. They can also change the
quantity of each item they ordered directly in the Order Summary page, including
making the quantity zero. From the Order Summary page,
they users can: After the users make payment
through one of the payment screens, the user will be brought to the thank you
page. After 5 seconds, the system
will automatically show the Initial screen. The Thank You page also has a StartOver
button that lets users to go to the Initial screen immediately. We used Microsoft Access
and Visual Basic for Applications (VBA) to make our prototype. The main reason
is that two of our team members have some experience with the tool before. Since
we are likely to use Visual Basic to create our prototype later in the design
stage, using VBA should give us a quick start on the prototype, which can then
easily migrate to the full-blown version. Using a DBMS tool helped
us in managing the content of our system. We can store the menu in a database,
which saves us some time in creating the menu display pages. We can use the
same form for different groups of food. We then just code the changes that the
form needs to have for different groups of food. Using Microsoft's built-in
graphical components, however, has some limitations. For example, resizing radio
buttons or checkboxes would only resize their labels, not the buttons or the
boxes themselves. VBA methods are very much subject to the structure of the
parent application, in this case, Microsoft Access, which is quite complex in
some areas. Some functionalities could be implemented much more easily coding
from scratch. For example, using Access forms to display data from the database
leaves little room for us to be creative in designing the form layout. By default,
data can only be displayed vertically. We cannot tile the display of data. Another problem that we
had is that using lots of pictures can easily make the application run very
slowly and have a very big size. We chose to leave the form that contains a
lot of pictures open all the time in order to improve the speed and reduce network
traffic (when we work from the SIMS home directory, not from the local drive).
For description of how to
run the interface, see Appendix D. First-Interactive
Prototype
Prototype Overview
2. Use of other languauges. We do not implement the system in other language
versions. The first page only implies how the design can be implemented with
other language options.
3. Pictures of the food. We use pictures that are not real images of the food
items.
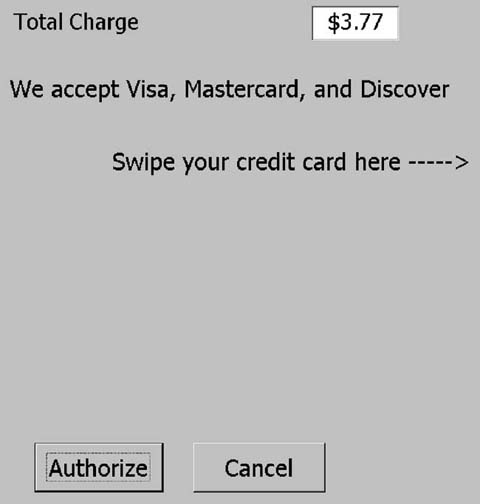
4. Physical payment process. We cannot simulate the physical actions and interactive
feedback in the payment activities. For example, we cannot give feedback about
the validity of an ATM card's PIN number that the customers enter nor the validity
of a credit card. We cannot simulate the dollar bill inserting process.
So, in the payment screens,
we assume that users will put the cash to the machine, swipe the cards, get
the appropriate feedback, and/or get the receipt after they finish ordering.


Tools We Used