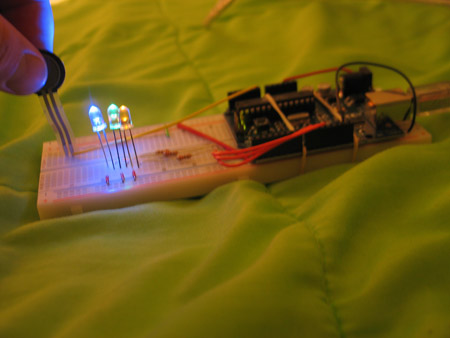
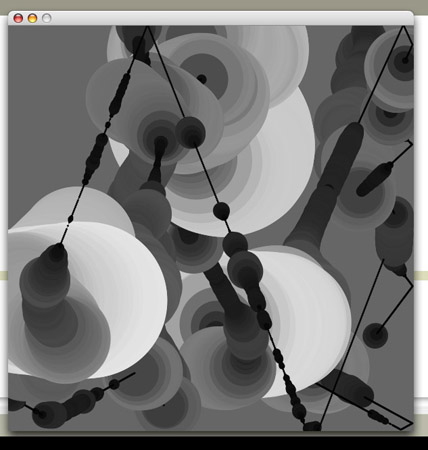
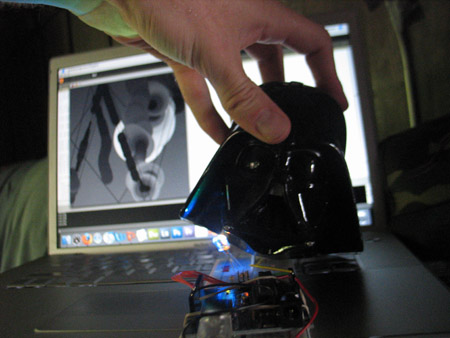
I used the force sensor on the Arduino board to control a basic drawing application in Processing. In the Processing app, a ball traverses the screen as in the basic bouncing ball application, but lays down a trail behind it. By varying the pressure on the force sensor, users can control the size and brightness of the ball as well as its speed and direction of travel. LEDs on the Arduino board provide additional feedback about the amount of pressure applied to the sensor. A Darth Vader Pez dispensor head attached to the sensor provides the Force!
Components
Arduino Board
Breadboard
LEDs (Green, Blue, Yellow)
Jumpers (4)
220 Ohm Resistors (3)
Lengths of wire (8)
10 Ohm Resistor (1)
Force Sensor (1)
Giant Darth Vader head from Pez dispensor (1)
Arduino Code
/*
* pulls in data from one force sensor and writes it out for use in Processing.
*/
int pCellPin1 = 0;
int input0val = 0;
void setup() {
Serial.begin(9600);
}
void loop() {
input0val = analogRead(pCellPin1);
if(input0val != 0){
Serial.println(input0val);
//light up the LEDs
analogWrite(9, input0val/4); // analogWrite can be between 0-255
analogWrite(10, input0val/4);
analogWrite(11, input0val/4);
}
}
Processing Code
/**
* Force Paint
* (An extension of the basic bouncing ball demo. Uses input from the Arduino
* board to control the size, brightness, speed, and direction of the brush)
*/
int size = 60; // Width of the shape
int ellipseColor = 102; // Color of the shape
float xpos, ypos; // Starting position of shape
float baseXspeed = 0.75;
float baseYspeed = 1;
float xspeed = baseXspeed; // Speed of the shape
float yspeed = baseYspeed; // Speed of the shape
int xdirection = 1; // Left or Right
int ydirection = 1; // Top to Bottom
float sinComponent = 0;
float sinIncrement = TWO_PI/360;
float cosComponent = 0;
float cosIncrement = TWO_PI/360;
//Arduino Serial Input
import processing.serial.*;
String portname = "/dev/tty.usbserial-A4001nyN";
Serial port;
String buf="";
int cr = 13; // ASCII return == 13
int lf = 10; // ASCII linefeed == 10
void setup()
{
port = new Serial(this, portname, 9600);
size(600, 600);
noStroke();
frameRate(30);
smooth();
background(102);
// Set the starting position of the shape
xpos = width/2;
ypos = height/2;
}
void draw()
{
// Update the position of the shape
xpos = xpos + ( xspeed * xdirection );
ypos = ypos + ( yspeed * ydirection );
// Test to see if the shape exceeds the boundaries of the screen
// If it does, reverse its direction by multiplying by -1
if (xpos > width-size || xpos < 0) {
xdirection *= -1;
}
if (ypos > height-size || ypos < 0) {
ydirection *= -1;
}
// Draw the shape
fill(ellipseColor);
ellipse(xpos, ypos, size, size);
}
void serialEvent(Serial p) {
int c = port.read();
if (c != lf && c != cr) {
buf += char(c);
}
if (c == lf) {
int val = int(buf);
println("val="+val);
ellipseColor = size = val > 3 ? val/4 : 3;
if(val > 200){
xspeed = getSinComponent() * (val/128);
}if(val > 400){
yspeed = getCosComponent() * (val/128);
}
buf = "";
}
}
//get sin adjusted values to help vary shape movement
float getSinComponent(){
return sin(sinComponent += sinIncrement);
}
float getCosComponent(){
return cos(cosComponent += cosIncrement);
}
Arduino with Force Sensor

Processing Output

Use The Force 


Comments
Wes! It's beyond awesome
Wes! It's beyond awesome that darth vader is providing the force :) Anyways, I wasn't initially convinced by the description of the visual until I saw the beautiful images you produced. Very nice job!