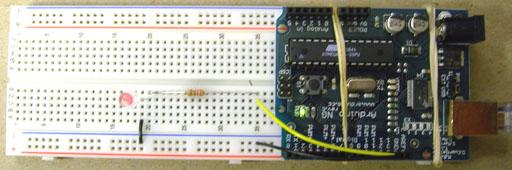
Description: After modifying the Arduino board on the breadboard and completing the circut, the LED stars to blink. The picture shows the blinking status.
Components Used:
Red Light Emitting Diode (LED)
The 220 Ohm Resistor / Breadboard/ Wires
Arduino Code:
/*
* Blink
*
* The basic Arduino example. Turns on an LED on for one second,
* then off for one second, and so on... We use pin 13 because,
* depending on your Arduino board, it has either a built-in LED
* or a built-in resistor so that you need only an LED.
*
* http://www.arduino.cc/en/Tutorial/Blink
*/
int ledPin = 13; // LED connected to digital pin 13
void setup() // run once, when the sketch starts
{
pinMode(ledPin, OUTPUT); // sets the digital pin as output
}
void loop() // run over and over again
{
digitalWrite(ledPin, HIGH); // sets the LED on
delay(1000); // waits for a second
digitalWrite(ledPin, LOW); // sets the LED off
delay(1000); // waits for a second
}

Comments
feedback
Report is missing components section. Otherwise, Looks good! Congrats!
dave
Thanks Dave! I've added
Thanks Dave!
I've added components section and modified according to your example.