- Overview
- Task Scenarios
- Revised Interface Design
- Interactive Prototype
- Screen Dumps
- Prototype Descritpion
- Petter: write-up (revised interface design, prototype overview)
- Hans: prototype creation, write-up (overview, prorotype overview)
- Masako: prototype creation, write-up (storyboard, tools, prototype description)
- Mohammed: demo preparation, presentation
Who worked on what?
1. Overview
In order to test our design thoroughly, we have created a computer-based interactive prototype of the user interface. The model implemented is based on the results from the low-fi prototyping. The purpose of the interactive prototype is to test interface ideas. Hence, to simplify the implementation, several aspects of the application functionality are simulated. The main idea behind the prototype is to provide what's needed by the test users in order to get a feeling with the user interface and the application environment. We have implemented the prototype using Visual Basic, an executable file is available on this page.2. Task Scenarios
The following three scenarios are used based on the earlier task analysis;- A.
Adding, saving and sorting bookmarks and folders
B. Browsing with History Map view
C. Power search history records in calendar view
You organize your bookmarks using folders. Recently you have visited several newspaper web sites and saved these sites as bookmarks. Now you are viewing The New York Times homepage.
- 1.
Add this page to your bookmark.
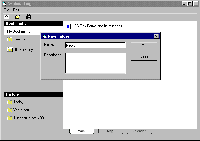
2. Create a new folder to store several newspaper web sites.
Name the folder "News".
3. Put related bookmarks to the "News" folder.
- 4.
Open a history folder for yesterday.
5. Find The Financial Times site in the folder.
6. Move the site to the "Newspaper" folder.
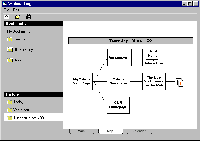
You would like to view your history files using the "Map" view in Webmarking. The "Map" view allows you to view your history files (pages you've visited) in a graphical format showing not only the pages you've visited but which pages you visited them from as well. Pages viewed in this view are connected then by other pages that may have links to them. In this case, you would like to view all the pages that you visited from The New York Times home page.
- Go to the "Map" view.
- Find and select The New York Times home page as the root document in the "Map" view.
- Find the second page of one of the articles you read.
You would like to perform a search to find the page from The New York Times that you visited last week. The problem, however, is that you are not sure when last week. You are certain that it was not Friday nor was it Wednesday. You decide that the best way to find this page is by having the search results displayed in the "Calendar" view so that you can go to last week's files and see for yourself when it was.
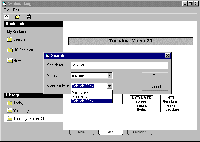
- Open Search dialog box to start a search on all pages from The New York Times. Select "Calendar" view as a result view
- Change the view to "Week" and determine which day (not Fri and not Wed) it was when you visited The New York Times.
3. Revised Interface Design
Differences from the previous designAccording to our lo-fi testers, there should definitely be possible to add bookmarks directly from the Webmarking application. Consequently, an "Add bookmark" button has been added to the toolbar, allowing the application to add the current website by interfacing directly with the browser. If the user has several active browser windows, a dialog box with the names and URLs of each website will pop up, allowing the user to choose which one to add.
Similarly, an "Open page" button has been added, giving the users an additional way of expanding (i.e., opening in a browser window) any selected bookmark or history file (the original way of doing this would be to double-click the icon). Also, when the user places the mouse pointer at any icon, information such as the URL, full site name and date will pop up (this will allow the interface to show more information than previously without increasing the icon size).
For the calender view, the most important change is the inclusion of a time period selection field. This enables the user to easily choose between day, week and month view, which is obviously a required feature. We also decided to employ a shading scheme to indicate the number of times a particular site is present each day. This will simplify searching by allowing the user to focus on the days with most ’hits’ (i.e., days with dark grey shading). In a similar fashion, shading is used in map view to indicate the number of pages linked from one ’parent’ site. Furthermore, the testers’ ideas for the search dialog box have largely been incorporated. It is now possible to select view mode from this box, and the time ranges have been expanded (with ’anytime’ as default).
In addition, we also have a number of less significant design changes. These include:
- Automatic transferral of focus to new dialog boxes
- Revision of dialog box fields (i.e., ’Date’ field removed from ’New folder’ dialog)
- More visible tabs for changing view mode
In calendar view, the view spaces for Saturday and Sunday are extended
4. Interactive Prototype
OverviewWe have implemented the main application window as well as several important interaction methods to provide a way for test users to walk through the scenarios described above. Methods include menus, clickable icons and drag-and-drop operations. Dialogs for adding bookmarks and folders are implemented as well. Finally, we have included three different view modes: Main, map and calendar views. The basic operations and functionality required by test users should be provided in this prototype.
What was Left Out and Why
In our current prototype, we have severly limited the functionality of the various view modes. Moving files from a calendar view of history files to a bookmark folder, for instance, is quite restricted – only the file that our scenario calls for to be moved can actually be moved. Implementing an entire set of movable icons for several view modes would simply be too much work at this time.
Though our Webmarking application is intended to function as an integrated part of the Web browser, the VB prototype we have at this stage is strictly stand-alone. This is mainly due to two reasons: First of all, this integration is not strictly necessary from a tester’s point of view – the application’s functionality can be adequately examined even if it is separated from a browser. Secondly, the integration of a VB program and a browser is, if not entirely impossible, well beyond our team’s abilities.
Wizard of Oz
The existing ’New folder’ and ’Add bookmark’ functions do not at all actually create any new objects. Rather, the object is already there – ’creating’ it simply makes it visible. This does of course mean that only a limited number of new items can be created. Similarly, our file structure and directories are completely fake – they appear to behave as their real counterparts as long as the user performs one of rather limited number of operations we support (such as moving the correct history file into the correct bookmark folder). Naturally, the icons are also fake - they don’t represent any data file (such as a Web site or an URL).
Tools
We used Visual Basic (VB) as the prototyping tool. VB offers an easy way to place and arrange different kinds of controls (command buttons, icons etc.) using mouse. This WYSIWYG feature makes it very easy to create and modify interface components in very short time.
However, we found that it was not easy to create interface which was not "Windows standard." For example, "directory list box" supplied as a VB control looks into the actual directory in the hard drive of the executing machine. And the control supports standard behaviors of the folders such as changing directory by double-clicking and changing the face of an icon based on the state of the directory. For our prototype, folders represent the concepts of grouping of bookmarks and history files, not the actual directories. Therefore, we couldn't use the "directory list box" control and had to create a list of folders and their behavior from scratch.
It is a great tool for the rapid prototyping of the interface thoroughly following the Windows convention. But for an experimental interface like ours, it requires additional coding.
5. Screen Dumps
Screen Dumps
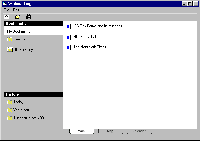
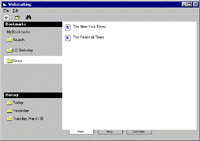
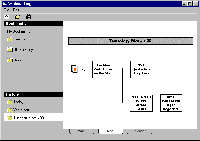
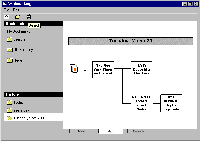
Follow "next" links to view screen images in the order of the storyboard of three scenarios.
6. Interface Descritpion
The executable program "WebMarking" for this prototype is stored inTo start the program, go to the directory and double-click the file using the SIMS NT machines. If you have any problem, please contact Masako.
Scenarios are available on thie page. Please note the prototype works only for tasks specified in the prototype. Refer to the storyboard if you have trouble finding what to do. The storyboard shows you the screen shot of each step you take to perform the scenarios.
03/31/99

