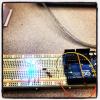
Introduction to Arduino and Physical Computing
Description
Make 3 LED lights blink at the same time with high/low less than 1 second.
Components Used
1- Arduino Uno
1- Breadboard
1- 220 Ω Resistor
1- Green LED
1- Blue LED
1- Red LED
Description
I used Arduino with a green LED. I changed the code to lighting up for 2 seconds and then off for 4 seconds. Uploaded the code and made sure that it has changed.
Description
The purpose of this lab was to get the Arduino environment set up and to use an example program for the Arduino to blink an LED. The code was then modified to blink three LEDs simultaneously every 500ms.

Description
Initially, in class, I set up the circuit with 1 green LED, and edited the code to make the LED blink faster, with a 0.1 second flash-delay cycle.
I then re-created the circuit with two LEDs, green and blue, and changed the code to make the two LEDs blink with variable speed. (green with a 0.1 second flash-delay and blue with a 1.0 second flash-delay cycle).
Description
When trying out the blue LED, I was impressed by the intensity of light. I wanted to be able to turn it down and so rather than just make the light blink, as per the sample code, my code slowly pulses the light using the analogWrite command.
Description
This lab consisted of three steps: install the arduino environment on my computer, set up an LED on the breadboard, and change the blink example sketch to have the LED blink at my own rate. The LED is grounded with the green wire, and connected to a 220 ohm resistor, which leads to the arduino through the orange wire.

For this assignment, I made two LEDs blink, one at half the frequency of the other.
code
Assignment # 1: Blink LED
Description
As it was my first experience making an Arduino board, I followed the BLINK example under the File / Examples / Basics folder by setting blinking time for 0.1 second, then turn off for 5 second, repeatedly.
Components
1. Arduino UNO
2. Breadboard
3. Red/Red/Brown/Gold Resistor
4. Green LED
Code
For this assignment, I created a blinking LED display by running a simple circuit through a single LED light from an Arduino UNO board. I used a provided code sketch to cause the light to blink on and off in intervals of one second, then modified the code (see below) to create a sequence of two short blinks and one long blink.
Components used:
1 Arduino UNO Board
1 Breadboard
1 220-ohm resistor
1 LED light
1 USB Power Supply
Code:


