Assignment: Introduction to Arduino and Physical Computing
Collaborators:
Description
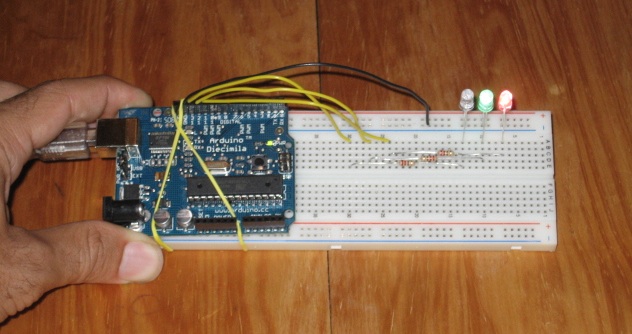
Make the LED blink by programming the Arduino and connecting a breadboard.
Materials
3 220-ohm resistors
3 LEDs
Arduino board
**Note** I added two other LEDs to make things more colorful by adding two other ints "ledPin2" and "ledPin3". I gave them each a small delay and ran them in the same loop, creating a flowing blinking pattern.
Code
int ledPin = 13; // LED connected to digital pin 13
int ledPin2 = 12;
int ledPin3 = 11;
void setup() // run once, when the sketch starts
{ pinMode(ledPin, OUTPUT);
pinMode(ledPin2, OUTPUT);
pinMode(ledPin3, OUTPUT); // sets the digital pin as output }
void loop() // run over and over again
{ digitalWrite(ledPin, HIGH); // sets the LED on
delay(100); // waits for a second
digitalWrite(ledPin2, HIGH); // sets the LED on
delay(100);
digitalWrite(ledPin3, HIGH); // sets the LED on
delay(100);
digitalWrite(ledPin, LOW); // sets the LED off
delay(100); // waits for a second
digitalWrite(ledPin2, LOW); // sets the LED off
delay(100); // waits for a second
digitalWrite(ledPin3, LOW); // sets the LED off
delay(100); // waits for a second }