Figure: Open CVS Perspective
We will be using the Concurrent Version System (CVS) in INFOSYS 255 as a mechanism for submitting electronic versions of your assignments (e.g. your Java programs). While this may seem like the process is more involved than it needs to be, it provides a good opportunity for you to learn one of the important software development tools. Furthermore, it is a tool that can be used for many types of other collaborative development, such as writing documentation.
There are a number of reasons to use a version control system:
Version control is a process by which you can keep a recorded history of the changes to your files (e.g. software source/code). A version control system, such as the Concurrent Version System (CVS), is an system that helps you accomplish version control of your files.
A version control system is useful for a number of reasons, the most important is to keep a historical record of the various versions of files you are developing. Should you accidentally delete a file or a portion of a file that you are working on, you can recover the most recent version, or any version, of that file. Of course, you must periodically commit (a.k.a. "checked-in") your files to the version control system for this process work. A version control system is typically used by software development teams as a mechanism for sharing the development of the various files in a project.
Additional overviews of CVS can be found in the references section below.
A version control system typically has two parts. There is the versions control server and the clients. The version control server is accessed over a network – a local network or wide area network such as the Internet – by a version control client. The version control server manages access to the version control repository. Version control clients come in a variety of flavors: command line clients, window/gui clients, plug-in clients (for applications like Eclipse and file explorers).
There are a variety of CVS clients: command line clients, windows clients (e.g. WinCVS), and plug-in clients like Tortise (plug-in for Windows Explorer) and the Eclipse CVS plug-in. This tutorial will address the Eclipse CVS plug-in. Note that the concepts carry over to other clients.
This tutorial assumes that you are familiar with Eclipse and have already created a project in Eclipse that you wish to version control.
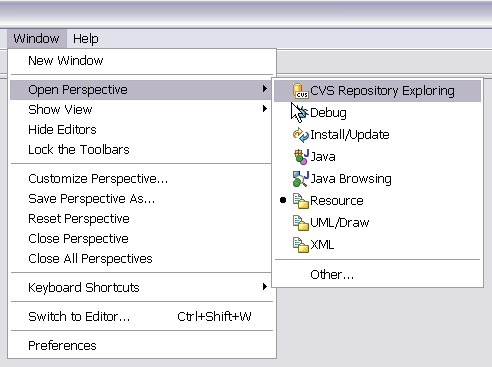
There is an Eclipse perspective for CVS. You can enable this perspective from the Window menu:
Window → Perspective → CVS Repository Reporting
Figure: Open CVS Perspective
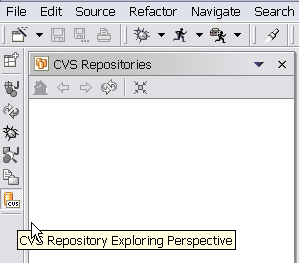
Figure: CVS Repository Exploring Perspective
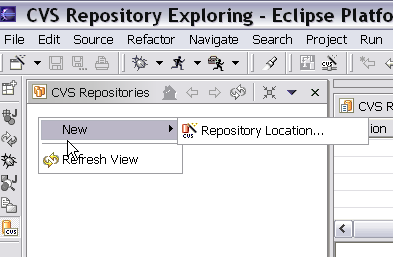
It is necessary to establish a connection with a CVS repository (the version control server). To do this:
dream.sims.berkeley.edu
cvsroot directory/folder.
The path will be of the the format: /home/
user-id
/cvsroot
/home/oski/cvsroot
extssh from the drop-down list.Figure: Add CVS Repository Dialog

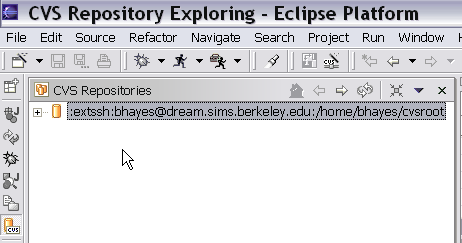
After validation, CVS Repositories window in Eclipse will show the connected repository. Note that you can have multiple repositories.
Figure: CVS Repositories
To save (commit) your Eclipse project to the CVS Repository follow the instructions below.
Name your projects so that they include your first initial and last name and the
assignment number. For example:
oski.a3 or 255.oski.a3.
Figure: Sharing a Project
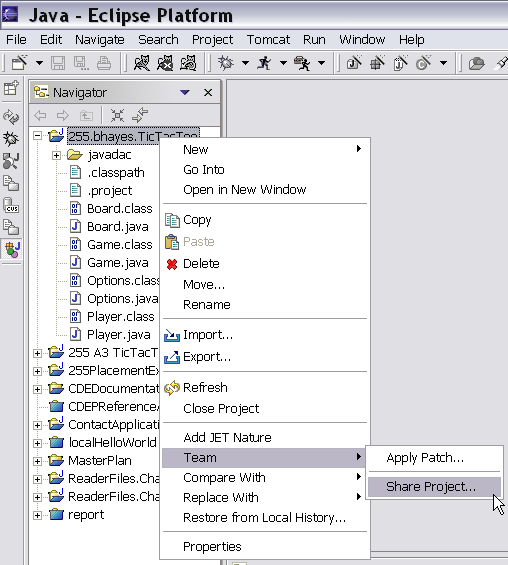
Figure: Sharing a Project
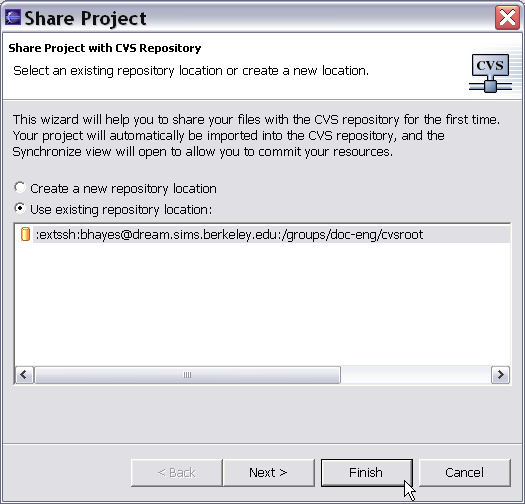
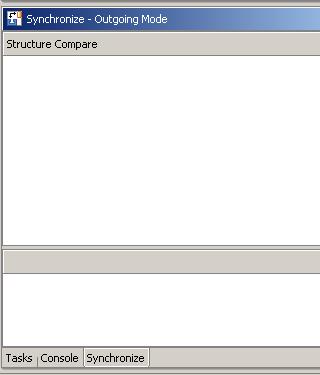
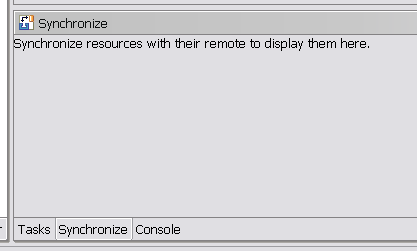
Figure: Synchronize Window
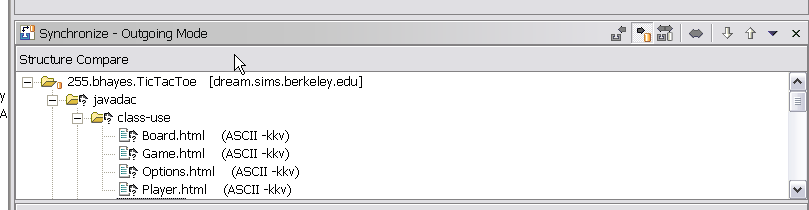
Figure: Commit Project to Version Control
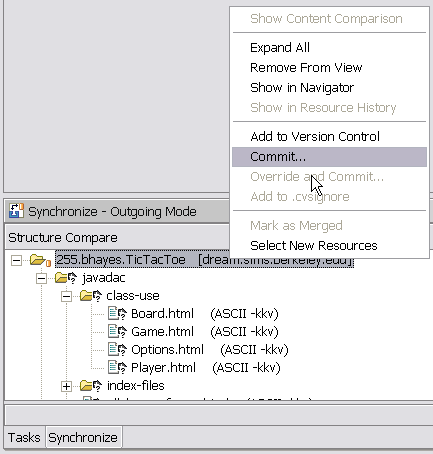
Figure: Confirm Add to CVS Version Control
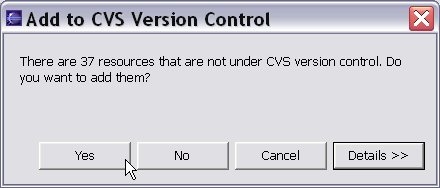
Figure: Commit Dialog
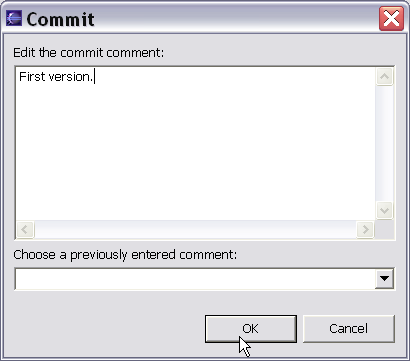
Figure: Check Commit
The process of committing changes in your files that are also in CVS (your working copies), is similar to the process described in the previous section.
Figure: Team Commit Menu Item
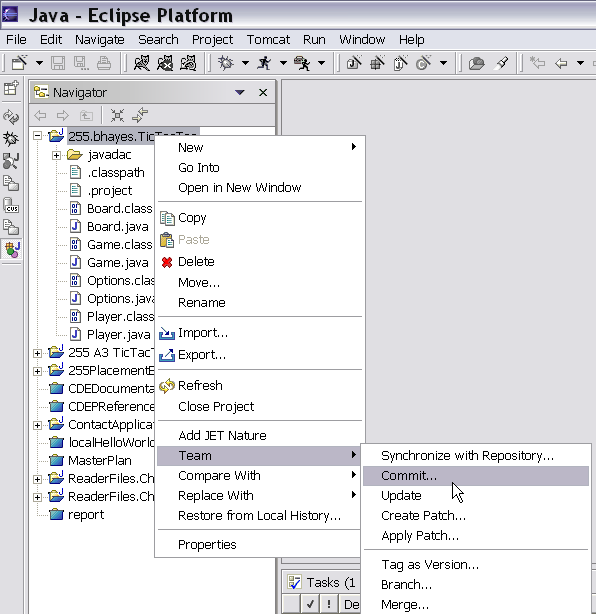
Figure: Commit Dialog – File/Project Update
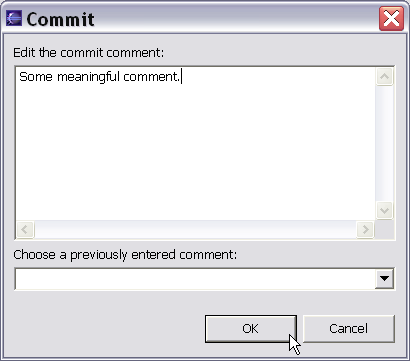
Figure: Check Synchronize Window/Tab
TBD
TBD
TBD